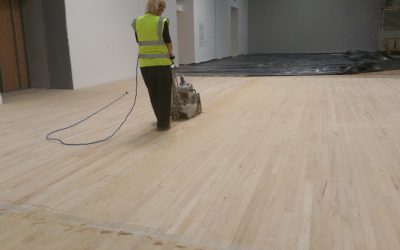
Why Hardwood Floor Sanding Is the Best Choice for Tired Timber
When your timber floors start to look tired, dull, or scratched, it’s easy to think replacement is the only option. In reality, professional hardwood floor sanding and refinishing can make them look richer, fresher and more luxurious than you ever remember – often at a fraction of the cost of new flooring.
For homeowners across the UK, a beautifully restored wooden floor is one of the most effective ways to transform a room. With the right equipment, products and expertise, even heavily worn boards can be brought back to life with a deep, natural sheen and a silky-smooth finish underfoot.
In this guide, we’ll walk you through what’s involved in hardwood floor sanding & refinishing, the benefits, and why choosing a specialist such as Sanded Floors is the easiest way to achieve a flawless result that lasts.

Why Hardwood Floor Sanding & Refinishing Is Worth It
1. Restore the natural beauty of your wood
Over time, daily wear, UV light, pet claws, furniture movement and old cleaning products all take their toll. The surface coating becomes scratched and patchy, and the timber itself can begin to look grey and lifeless.
A professional hardwood floor sanding service removes the damaged top layers of old finish and micro-scratches, revealing clean, fresh timber beneath. Once refinished, the grain pattern, colour variation and character of the wood are restored, giving your room a warm, high-end feel again.
2. Extend the life of your flooring
Quality hardwood is designed to last for decades. The vast majority of “ruined” floors are actually just in need of floor sanding and refinishing rather than replacement. Each sanding cycle typically removes less than a millimetre of timber, so most solid and engineered floors can be restored multiple times over their lifetime.
By renewing the protective finish, you’re protecting the wood from spills, moisture and abrasion, delaying the need for expensive replacement.
3. Improve cleanliness and hygiene
Old finishes often harbour ingrained dirt in scratches and gaps. This can make your floors feel permanently dusty, however often you clean. When you book professional floor restoration, the sanding process smooths the surface and allows a new, fully sealed finish to be applied.
The result is a more hygienic floor that’s easier to sweep, vacuum and mop – ideal for busy households and allergy sufferers.
4. Add value and kerb appeal
Hardwood floors are a major selling point in UK homes. Estate agents consistently highlight well-presented timber floors in listings, as they suggest quality and easy maintenance.
Investing in wood floor sanding and sealing before you sell can make your property more attractive to buyers and help it stand out in a competitive market.
5. Customise your look
Refinishing gives you a chance to change the feel of your interiors without touching the structure. You might choose:
- A light, Scandi-style matt finish
- A deep, rich walnut stain for a more traditional look
- A subtle tint to complement modern décor
With professional wood floor staining and refinishing, you can tailor the colour and sheen exactly to your taste.

What Exactly Is Hardwood Floor Sanding?
Hardwood floor sanding is a multi-stage process that involves carefully removing the old finish, levelling the surface, and preparing the timber for a new protective coating.
Step 1: Assessment & consultation
A reputable company like Sanded Floors will always begin with a detailed assessment of your floor:
- Type of wood (oak, walnut, maple, etc.)
- Thickness of the boards and wear layer
- Existing finish (varnish, oil, wax, stain)
- Presence of nails, old repairs, or damaged boards
- Any movement, cupping or gaps
From there, they’ll recommend the best combination of floor sanding and refinishing services to achieve your preferred look and durability.
Step 2: Preparation and repairs
Before the machines even touch the floor, preparation is essential:
- Furniture is removed or carefully protected
- Loose boards are secured
- Old nail heads are punched down
- Damaged boards may be replaced
- Gaps can be filled with resin or timber slivers where appropriate
This is also where floorboard repair and gap filling comes into play, ensuring the surface is sound and stable before sanding begins.
Step 3: Professional dust-controlled sanding
Modern sanding systems are worlds away from the dusty DIY machines many people remember. Professional dust-free floor sanding uses high-spec belt sanders, edgers and industrial extraction to keep dust to a minimum and deliver a perfectly even result.
The contractor will usually work through several grades of abrasive:
- Coarse grit to remove old finishes and level the surface
- Medium grit to refine the cut and remove marks
- Fine grit to smooth everything ready for finishing
Edges, corners and stairs are sanded with specialised tools to match the main floor.
Step 4: Fine finishing & detail sanding
Once the main sanding is complete, the floor is often buffed with a mesh screen or finishing pad. This blends any tiny differences between passes and helps open the grain to accept finishes evenly.
At this point, the surface should feel completely smooth underfoot – the perfect canvas for your chosen finish.

Choosing the Right Finish for a Rich, Fresh Look
The finish you choose will define both the appearance and the durability of your restored floor. A professional floor refinishing service will guide you through the options, which typically include:
Lacquered (varnished) finishes
Lacquered finishes offer strong protection and are ideal for busy homes, hallways and commercial areas. Modern lacquers are:
- Available in matt, satin or gloss
- Highly resistant to spills and abrasion
- Easy to maintain with simple cleaning routines
A matt lacquer gives a natural, contemporary appearance, while satin provides a soft sheen that many homeowners love.
Hardwax oil finishes
Hardwax oils penetrate the wood and leave a more natural look and feel. They’re particularly popular for:
- Period properties
- Rustic or character floors
- Rooms where you want a warm, natural aesthetic
They’re slightly more forgiving of small scratches (which can often be spot-repaired), making them ideal for households with pets or young children.
Stains and colour options
If you want a significant colour change, wood floor staining can be applied after sanding and before the protective coats:
- Light tints for an airy, spacious feel
- Mid-tones for classic oak looks
- Dark stains for dramatic, luxurious interiors
A professional will always test colours on your actual floor so you can see how they interact with your timber species and room lighting.

Professional vs DIY Sanding – What You Need to Know
You can hire small sanding machines from DIY stores, but there are good reasons most homeowners now opt for professional hardwood floor sanding instead.
Common DIY issues
- Visible drum marks and ripples from uneven movement
- Gouges and dips where the sander was left running in one spot
- Uneven sanding near edges and in corners
- Patchy staining because the floor wasn’t fully levelled
- Excessive dust spreading through the house
Fixing these problems often requires another full sanding cycle – at which point the cost and disruption quickly outweigh any initial savings.
The benefits of hiring a specialist
A professional team brings:
- High-powered, well-maintained sanding machines
- Industrial dust extraction for a cleaner, safer environment
- Experience with different timbers, patterns and finishes
- The ability to tackle tricky areas like herringbone and stairs
- Insurance and guarantees for peace of mind
When you factor in the value of your flooring, the overall look of your home and the time involved, expert floor sanding and restoration is usually the smartest choice.

The Sanded Floors Approach
Choosing the right contractor is just as important as choosing your finish. At Sanded Floors, the focus is on craftsmanship, clear communication and long-lasting results.
A typical project will include:
- A detailed survey and honest advice on what’s achievable
- Transparent pricing with no hidden extras
- Careful protection of adjacent areas and furnishings
- Hardwood floor sanding using modern dust-controlled equipment
- Expert floor refinishing with premium lacquers or oils
- Optional parquet floor restoration and staircase sanding where needed
- A clear aftercare plan so you know exactly how to look after your new finish
Whether it’s a single living room or an entire property, the aim is always the same: a rich, fresh look that lifts the whole space.
How to Prepare Your Home for Hardwood Floor Sanding
Good preparation helps your project run smoothly and reduces disruption. Here’s how to get ready before your floor sanding and refinishing appointment.
1. Clear the room
Where possible, remove furniture, rugs and small items from the room. Larger pieces may be moved to one side and carefully protected if they cannot leave the space.
2. Remove fragile items
Take pictures, mirrors and delicate objects off walls and shelves. Even with dust extraction, it’s sensible to protect belongings from vibration and movement.
3. Arrange access and parking
Sanding machines and extraction units can be heavy. Clear access routes and, if possible, arrange parking close to your property so equipment can be brought in easily.
4. Discuss timing and expectations
Before work begins, confirm:
- Start and finish times
- Which rooms will be completed first
- Drying times for your chosen finish
- When you can walk on the floor again
A professional team will talk you through the schedule, especially if you’re living in the property while the work is carried out.

Aftercare: Keeping Your Floors Looking Rich & Fresh
Once your hardwood floor sanding & refinishing is complete, a little care goes a long way in protecting your investment.
The first 24 hours
- Avoid walking on the floor if possible, or wear clean socks only
- Do not place rugs or heavy furniture back yet
- Keep pets off the area until the finish has cured sufficiently
The first week
- Replace furniture carefully – lift rather than drag
- Fit felt pads to the bottoms of chairs, tables and sofas
- Avoid using wet mops or harsh cleaners
- Do not cover the floor with non-breathable rugs or plastic
Your floor refinishing specialist will advise exact timings depending on the products used and the conditions in your home.
Long-term care tips
- Use doormats at entrances to trap grit and moisture
- Sweep or vacuum regularly with a soft floor attachment
- Clean with a pH-neutral wood floor cleaner – never steam mops
- Refit or replace felt pads periodically
- For lacquered floors, consider a maintenance buff and re-coat every few years in high-traffic areas
By following these simple steps, your floors will stay rich and fresh-looking for many years.

Frequently Asked Questions
How often can hardwood floors be sanded?
Most solid hardwood floors can be professionally sanded several times over their lifetime, depending on the thickness of the boards and how aggressively they were sanded in the past. Engineered floors can also be sanded if they have a sufficient wear layer. A survey from a professional floor sanding company will confirm what’s safe for your particular floor.
Will sanding make a lot of dust?
Modern dust-free floor sanding systems capture the vast majority of dust at source. While no process is 100% dustless, you should expect a much cleaner experience than older DIY methods. Any light residue is usually wiped away during final cleaning before finishing.
How long does the process take?
The time required depends on the size of the area, the condition of the floor and the number of finish coats. A typical living room might be sanded and have base coats applied in a day, with additional coats and curing time over the following days. Your contractor will give a realistic timescale at survey stage.
Can all scratches and stains be removed?
Many surface scratches and light stains disappear completely during hardwood floor sanding. Deep gouges, pet stains or historic water marks may not vanish entirely, but a skilled restorer can often blend them in so they’re far less noticeable. In severe cases, board replacement may be recommended.
Is it worth sanding if I’m planning to sell?
Yes. Freshly refinished floors can make a powerful first impression and often help properties feel cleaner, brighter and more premium. The relatively modest cost of wood floor sanding and refinishing frequently pays for itself in improved saleability and stronger offers.

Ready for a Rich, Fresh Floor?
If your hardwood floors are looking dull, scratched or simply past their best, you don’t have to live with them – and you don’t have to rip them out either.
With expert hardwood floor sanding & refinishing, you can:
- Reveal the natural beauty of your timber
- Enjoy a richer, fresher look throughout your home
- Improve cleaning, hygiene and comfort
- Protect your investment for years to come
When you’re ready to transform your floors, get in touch with the specialists at Sanded Floors. Their professional floor sanding and refinishing services will help you fall in love with your hardwood all over again.